A touch of color
I’ve been pointing out a few little tips and tricks to improve your day-to-day quality of life when working with PowerShell. Here is a guide to making things a bit prettier.
I’m using PowerShell Core (pwsh), the cross-platform version of PowerShell, for this little demo, but it works with the built-in Windows PowerShell as well..
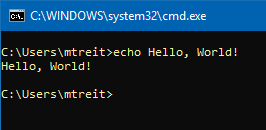
Here’s what pwsh looks like out of the box on my computer:
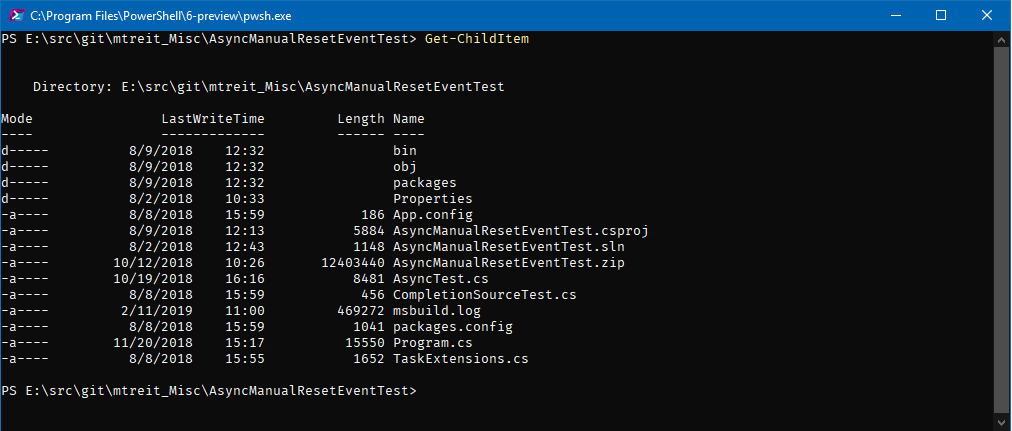
It’s a bit…boring.
You will notice some coloring of the various commands you type: the command will be in yellow, strings will be light blue, etc.
So, that’s at least something. But we can do a lot better!
A brief digression on color in the Windows Console
For a very long time, the colors used in the Windows console were pretty awful on modern displays.
The normal blue color is hardly visible, red is not much better and the light yellow is just garish.
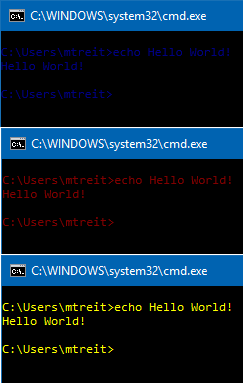
The great news is that the Windows command line team has been working hard on modernizing things, including fixing the terrible color palette. Clean installs of newer builds of Windows 10 have a new color scheme enabled by default, but if you are running an existing build there is a useful tool you can use to fix things up: ColorTool.
I recommend reading the blog post announcing the tool (linked above), which has some details on how to use it.
With the Campbell scheme, which is my preference, the blue color is still a bit dark, but compare it to the original. Text is at least legible with the new scheme.
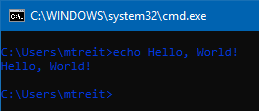
The lighter variants look much nicer now too:
PSColor
The PSColors module is our main conduit to a more pleasing and useful command line environment. If you have PSGet installed, it’s simply a matter of running:
Install-Module PSColorsAfter the module is installed, you will want to import it. Open $profile in your favorite editor and add this line to the top:
Import-Module PSColorsSave it, then dot source your profile to bring this change into your current context:
. $profileLet’s try that command again:
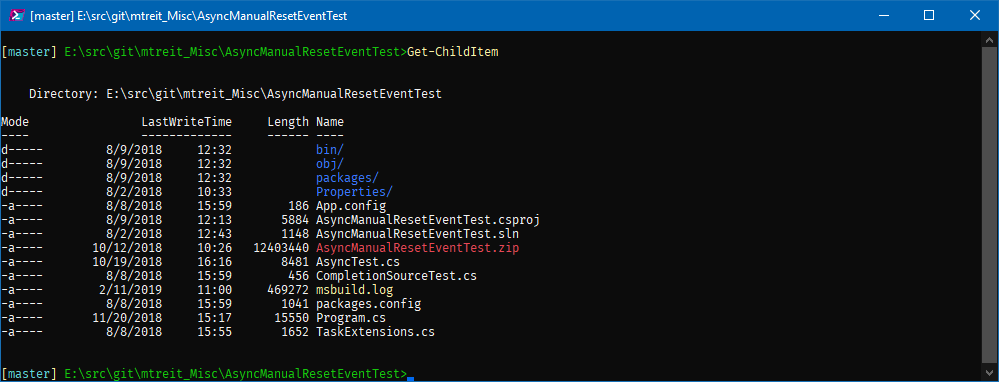
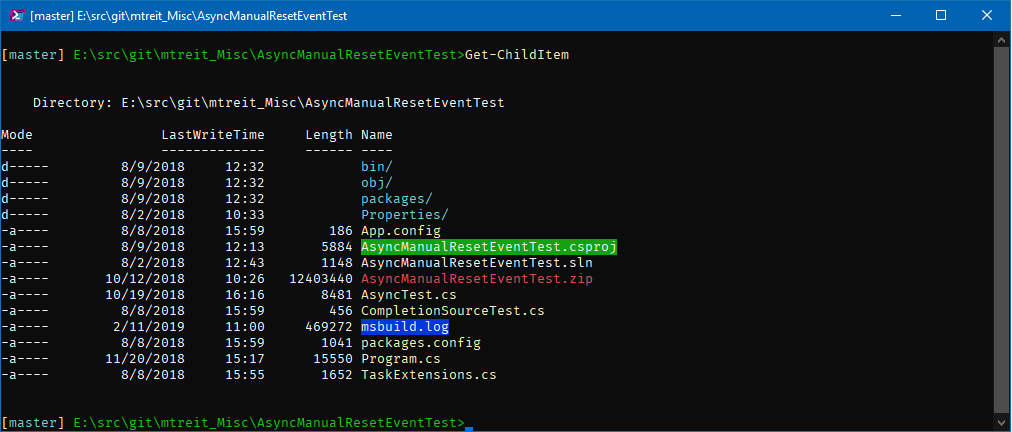
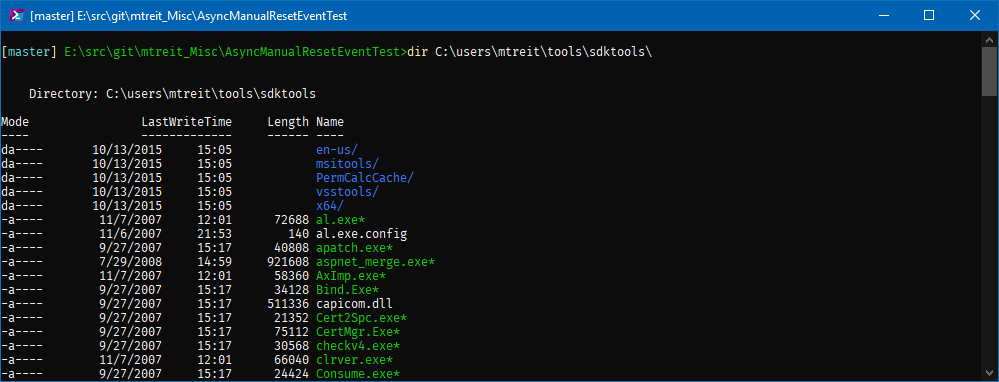
Getting nicer. We have some colorization happening based on the file types: light blue for folders, yellow for text files, red for compressed files, etc. Executable files (scripts, exes) show up as green:
While it’s nice to have colorized output, it would be even better if we can choose our own colorization rules. In fact, we can customize the PSColors module rules by editing the file here:
notepad++ "$(Split-Path $profile)\Modules\PSColors\1.2.1\PSColors.format.ps1xml"Note: on my computer modules are installed for the current user by default (instead of for the entire machine), but if you don’t find PSColors.format.ps1xml in you user profile, check if it exists under $env:ProgramFiles\PowerShell\Modulesor $env:ProgramFiles\WindowsPowerShell\Modules (the latter if you are running classic PowerShell instead of pwsh.)
The guts of the coloring rules in this file look something like this by default:
if($global:PSColorsUseAnsi) {
    $regexOptions = ([System.Text.RegularExpressions.RegexOptions]::IgnoreCase)

    $executables = @('exe', 'bat', 'cmd', 'py', 'pl', 'ps1', 'psm1', 'vbs', 'rb', 'reg', 'fsx')
    $compresseds = @('zip', 'tar', 'gz', '[rjw]ar', 'arj', 'tgz', 'gz')
    $texts = @('txt', 'cfg', 'conf', 'ini', 'csv', 'log', 'xml', 'java', 'c(pp)?', 'fs', 'html?')

    $executableRegex = New-Object regex("\.($([string]::Join('|', $executables)))`$", $regexOptions)
    $compressedRegex = New-Object regex("\.($([string]::Join('|', $compresseds)))`$", $regexOptions)
    $textRegex = New-Object regex("\.($([string]::Join('|', $texts)))`$", $regexOptions)

    $directoryColor = "$([char](27))[34;1m"
    $executableColor = "$([char](27))[32;1m"
    $compressedColor = "$([char](27))[31;1m"
    $textColor = "$([char](27))[33;1m"
    $resetColor = "$([char](27))[0m"

    if ($_ -is [System.IO.DirectoryInfo]) {
        $name = "$directoryColor$name/$resetColor"
    }
    elseif ($compressedRegex.IsMatch($_.Name)) {
        $name = "$compressedColor$name$resetColor"
    }
    elseif ($executableRegex.IsMatch($_.Name)) {
        $name = "$executableColor$name*$resetColor"
    }
    elseif ($textRegex.IsMatch($_.Name)) {
        $name = "$textColor$name$resetColor"
    }
}
ANSI escape code sequences
You might be wondering what the deal is with those strange looking color values, such as: $textColor = "$([char](27)[33;1m".
Well, those are ANSI escape codes used to control the color output to your terminal. A good post on how to utilize such codes can be found here.
In a nutshell, the ASCII character 27 (or 0x1b in hexadecimal) represents the escape (ESC) character, which is followed by an escape sequence which controls how the following characters are to be handled. In our case, it changes how they are written to the screen.
In the blog post above, an example is given of combining escape sequences to produce underlined-text on a blue background:
\u001b[4m\u001b[44m Blue Background Underline \u001b[0m
Here the value 4 means underline and 44 means blue background. The example above for combining them is actually slightly more complex than necessary: we can use a semicolon to separate the combined values, so the example would become
\u001b[4;44m Blue Background Underline \u001b[0m
Or if we convert this to our PowerShell syntax, as seen in the PSColors syntax file, it would be this:
"$([char]27)[4;44m"The Wikipedia page for ANSI escape code has details on the various possible values available. Not all values will necessarily be meaningfully interpreted by the latest Windows console, but the basic color formatting ones now work quite nicely.
Let’s verify in PowerShell that we can conjure up the ‘underlined text on a blue background’ example, using the appropriate ANSI escape code sequence.
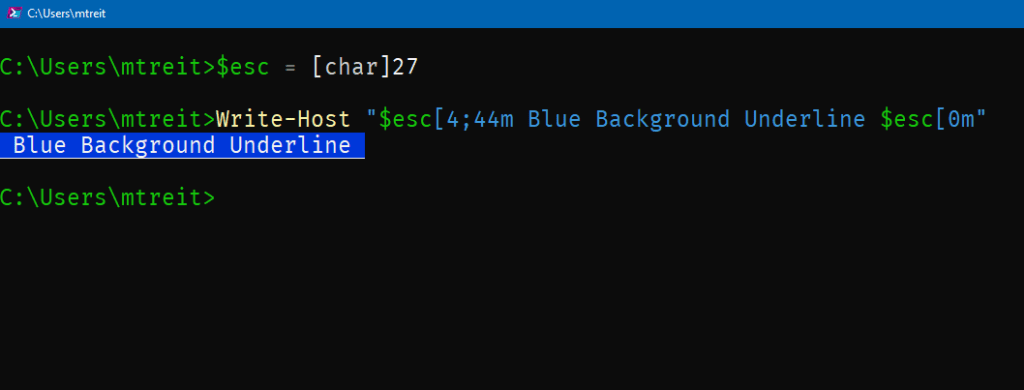
ANSI escape codes in action
Hey, what do you know? It works great. Thanks Windows command line team!
Now that we know how it works, we can customize the rules in the PSColors format file to fit our day-to-day needs. Recently I have been converting many of our C# projects to the newer, more modern SDK-style project format favored by .NET core and .NET standard projects. We have hundreds of projects, so it would be useful if project files stood out. We can add a new set of extensions to look for:
$projects = @('csproj', 'nuproj')Following the existing pattern in the file, we also need a regex:
$projRegex = New-Object regex("\.($([string]::Join('|', $projects)))`$", $regexOptions)…and a color:
$projcolor = "$([char](27))[42;1m"We’ll splice another condition into the logic used to choose which color sequence to return, and we’re done!
elseif($projRegex.IsMatch($_.Name))
{
    $name = "$projcolor$name$resetcolor"
}
In this case, [42;1m is going to give us a green background. We can explore all of the possible values and choose which ones we like by again using colortool.exe. We can view, for our current scheme, all of the possible combinations as follows: colortool.exe --current
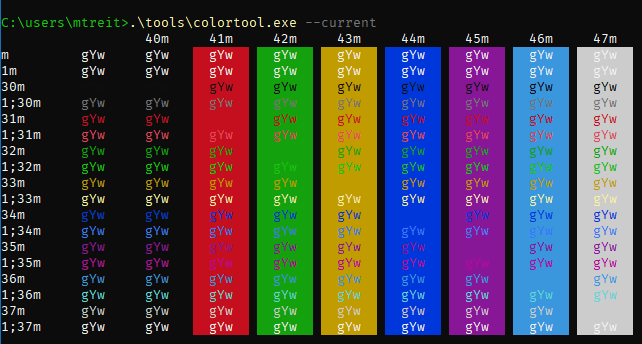
Here you can use the row and column header values as a kind of lookup to find the color you’d like to use. For instance, perhaps you like the yellow-on-gold color in the middle of the output. The gold background (column) has a value of 43m and the yellow text (row) has a value of 1;33m. So we just combine them into [43;1;33m:

So, choose the colors you like and customize the rules in PSColors to suit your needs and you should find your day-to-day PowerShell a much more pleasant experience!
After a few more tweaks to highlight log files differently, my final edits ended up looking something like this:
index 3073f5a..d22d2b5 100644
--- a/PSColors.format.ps1xml
+++ b/PSColors.format.ps1xml
@@ -90,27 +90,40 @@
                <ScriptBlock>
                    $name = $_.Name

-
                    if($global:PSColorsUseAnsi) {
                        $regexOptions = ([System.Text.RegularExpressions.RegexOptions]::IgnoreCase)

                        $executables = @('exe', 'bat', 'cmd', 'py', 'pl', 'ps1', 'psm1', 'vbs', 'rb', 'reg', 'fsx')
                        $compresseds = @('zip', 'tar', 'gz', '[rjw]ar', 'arj', 'tgz', 'gz')
-                        $texts = @('txt', 'cfg', 'conf', 'ini', 'csv', 'log', 'xml', 'java', 'c(pp)?', 'fs', 'html?')
+                        $texts = @('txt', 'cfg', 'config', 'conf', 'ini', 'csv', 'cs', 'csproj', 'xml', 'java', 'c(pp)?', 'fs', 'html?')
+                        $projects = @('csproj', 'nuproj')
+                        $logs = @('log', 'svclog', 'tsv')

                        $executableRegex = New-Object regex("\.($([string]::Join('|', $executables)))`$", $regexOptions)
                        $compressedRegex = New-Object regex("\.($([string]::Join('|', $compresseds)))`$", $regexOptions)
                        $textRegex = New-Object regex("\.($([string]::Join('|', $texts)))`$", $regexOptions)
+                        $projRegex = New-Object regex("\.($([string]::Join('|', $projects)))`$", $regexOptions)
+                        $logsRegex = New-Object regex("\.($([string]::Join('|', $logs)))`$", $regexOptions)

-                        $directoryColor = "$([char](27))[34;1m"
+                        $directoryColor = "$([char](27))[36;1m"
                        $executableColor = "$([char](27))[32;1m"
                        $compressedColor = "$([char](27))[31;1m"
                        $textColor = "$([char](27))[33;1m"
                        $resetColor = "$([char](27))[0m"
+                        $projcolor = "$([char](27))[42;1m"
+                        $logscolor = "$([char](27))[44;1m"

                        if ($_ -is [System.IO.DirectoryInfo]) {
                            $name = "$directoryColor$name/$resetColor"
                        }
+                        elseif($projRegex.IsMatch($_.Name))
+                        {
+                            $name = "$projcolor$name$resetcolor"
+                        }
+                        elseif($logsRegex.IsMatch($_.Name))
+                        {
+                            $name = "$logscolor$name$resetcolor"
+                        }
                        elseif ($compressedRegex.IsMatch($_.Name)) {
                            $name = "$compressedColor$name$resetColor"
                        }
Wrapping up, we can compare the before and after of out-of-the-box pwsh and the modified look after taking advantage of PSColors and a little knowledge of how to customize the ANSI escape sequences:
Before:

After:
